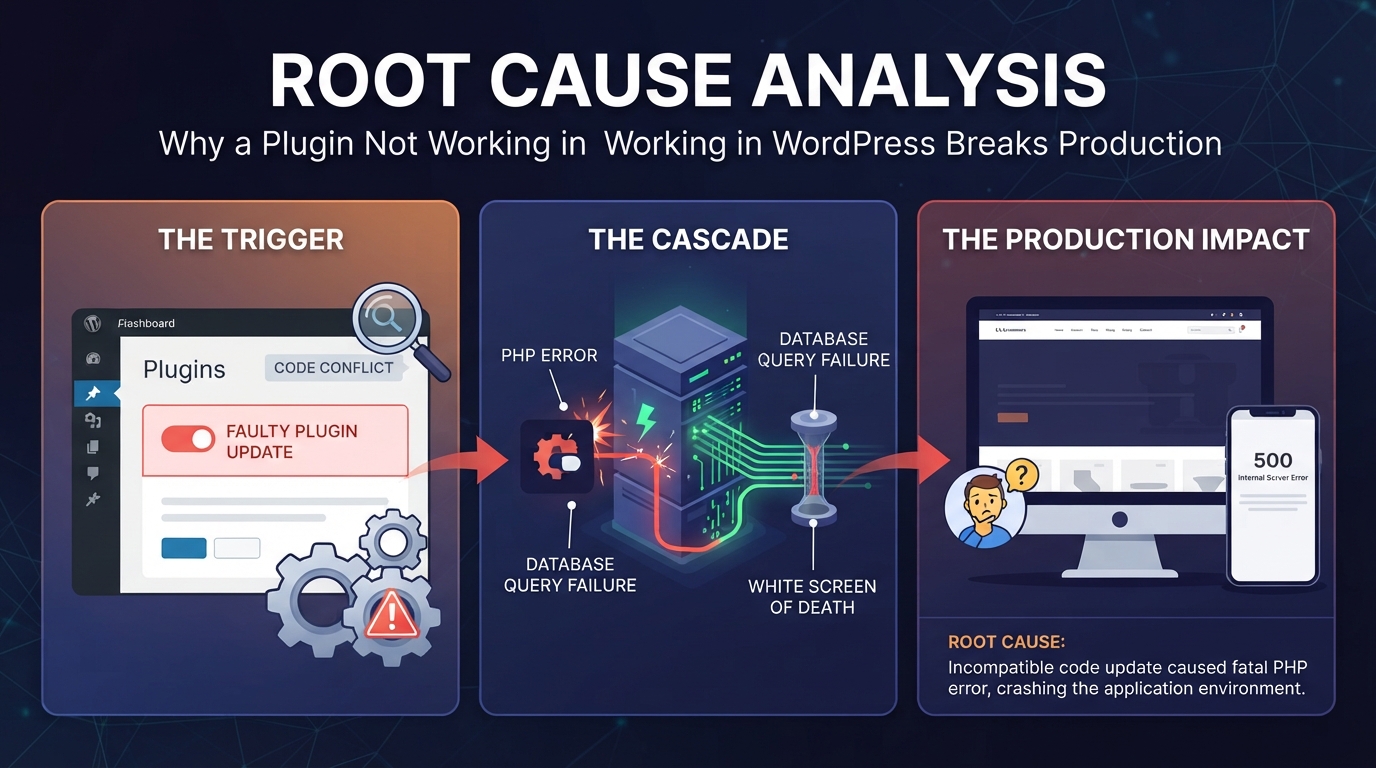
When a plugin stops working, it can break your website layout or stop important features from functioning. You do not need to be a coding expert to fix it. This guide walks you through simple, step-by-step methods to get your site running smoothly again.
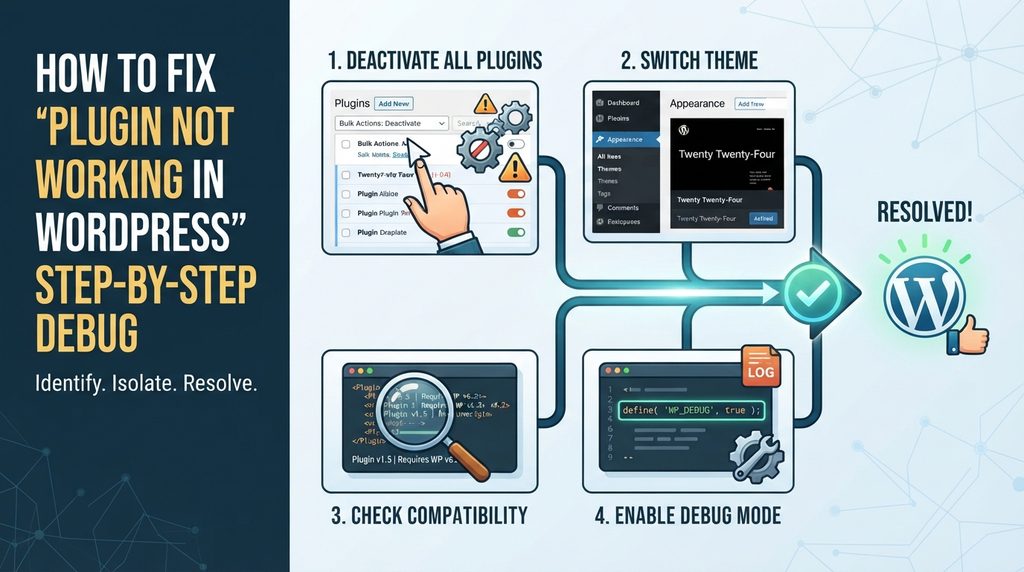
1. The Quickest Ways to Fix a Broken Plugin
When a plugin not working in WordPress disrupts your workflow, avoid randomly deleting files. Instead, use a structured workflow to isolate the breakdown quickly and safely.
1.Isolate via Mass Deactivation:
Phase 1.
If your admin dashboard is accessible, navigate to Plugins > Installed Plugins, select all active plugins, and choose Deactivate from the bulk actions menu. Check if your site functions normally.
Verification: The disappearance of the error or broken layout confirms a plugin is the root cause.
2.Identify the Culprit:
Phase 2.
Reactivate your plugins one by one, refreshing your web pages after each activation. When the error reappears, the last plugin you turned on is your culprit.
Verification: Pinpointing the exact conflicting tool allows you to target your fix or seek alternative software.
3.Inspect Live Error Logs:
Phase 3.
Run server commands or look at your hosting error logs to see if a specific function, script file, or memory limit triggered the crash.
Verification: A clear log entry points directly to the line of code or script causing the failure.
2. What to Do When Locked Out (The White Screen of Death)
If the plugin conflict completely locks you out of your WordPress dashboard, you cannot deactivate plugins normally. You must use your web hosting account’s file manager or an FTP/SFTP client:
- Log into your hosting control panel (such as cPanel, Plesk, or SiteGround Site Tools) and open the File Manager.
- Navigate to your website’s root directory, then open
wp-content>plugins. - Locate the folder of the broken or recently updated plugin.
- Rename the folder (for example, change
woocommercetowoocommerce-broken). - WordPress automatically detects that the folder name has changed and force-deactivates the plugin instantly, restoring your dashboard access.
3. Advanced Diagnostics: Inspecting Server-Side Logs & Error Traces
If a plugin not working in WordPress issue does not display a clear error message, you must enable WordPress debugging to capture runtime exceptions.
Open your wp-config.php file and add the following lines just above the comment reading “That’s all, stop editing!”:
PHP
// wp-config.php — enable debugging output to file
define( 'WP_DEBUG', true );
define( 'WP_DEBUG_LOG', true );
define( 'WP_DEBUG_DISPLAY', false );
define( 'SCRIPT_DEBUG', true );
@ini_set( 'log_errors', 1 );
@ini_set( 'display_errors', 0 );
Once active, trigger the broken action on your site and inspect the file located at wp-content/debug.log. A typical dependency or function mismatch error looks like this:
Plaintext
PHP Fatal error:  Uncaught Error: Call to undefined function acf_add_local_field_group()
in /wp-content/plugins/custom-fields-extender/init.php:14
This trace tells you exactly what went wrong: a secondary plugin relies on a function (in this case, Advanced Custom Fields) that either isn’t active or loaded after the plugin trying to call it. This is a classic hook execution order conflict.
4. Production Code Patch: Fixing Load-Order Bugs
If you manage your own code or need to patch a minor conflict until the developer releases an update, you can wrap dependency calls in defensive checks.
The Broken Approach (Vulnerable)
PHP
// BEFORE — causes a fatal error if the parent plugin loads later or is missing
add_action( 'init', function() {
    acf_add_local_field_group( array(
        'key'    => 'group_product_specs',
        'title'  => 'Product Specs',
        'fields' => array( /* ... */ ),
    ) );
} );
The Defensive Approach (Fixed)
PHP
// AFTER — defensive load with proper function checks and error handling
add_action( 'acf/init', function() {
    if ( ! function_exists( 'acf_add_local_field_group' ) ) {
        error_log( '[custom-fields-extender] Dependency missing — registration skipped safely.' );
        return;
    }

    acf_add_local_field_group( array(
        'key'    => 'group_product_specs',
        'title'  => 'Product Specs',
        'fields' => array(
            array(
                'key'   => 'field_sku',
                'label' => 'SKU',
                'name'  => 'sku',
                'type'  => 'text',
            ),
        ),
    ) );
}, 20 );
Using function_exists() checks and hooking into specialized initialization sequences (like acf/init instead of generic init) stops the site from crashing into a White Screen of Death.
5. Clearing Edge Caching & State Invalidation
If you have successfully deactivated or fixed a plugin not working in WordPress issue, but your live website still looks broken, you are dealing with a caching backlog rather than an active code failure.
Clear your website caches in this exact sequence to prevent serving stale data:
1.Flush Object Cache:
Layer 1.
Clear memory-based database caching layers like Redis or Memcached using your hosting tool or WP-CLI (wp cache flush).
Verification: Check cache metrics to verify memory allocations have dropped to a clean state.
2.Purge Page Caching Plugins:
Layer 2.
Clear your installed performance plugins (such as WP Rocket, LiteSpeed Cache, or W3 Total Cache).
Verification: Inspect page headers to confirm the generation timestamp has updated.
3.Purge CDN and Edge Network:
Layer 3.
Invalidate Cloudflare or other CDN edge nodes so global visitors immediately pull the fixed version of your assets.
Verification: Open your site in an Incognito/private browser window to check the live changes.
6. Protecting Your SEO and Crawl Budget During Outages
When a plugin breaks your site layout or shopping cart, it doesn’t just annoy human visitors—it harms your search engine performance.
- The Two-Wave Indexing Risk: Googlebot evaluates pages in two waves. The first wave reads raw HTML; the second wave executes JavaScript to render fully interactive components.
- The Fallout: If a broken plugin throws errors during the second wave, Googlebot records a malformed or blank DOM structure. This wastes your crawl budget and can cause temporary drops in search rankings.
- The Recovery Check: After fixing your plugin, go to Google Search Console, enter the affected URL into the URL Inspection tool, click Test Live URL, and review the rendered screenshot to ensure search bots see a fully functional page.
Leave a Reply